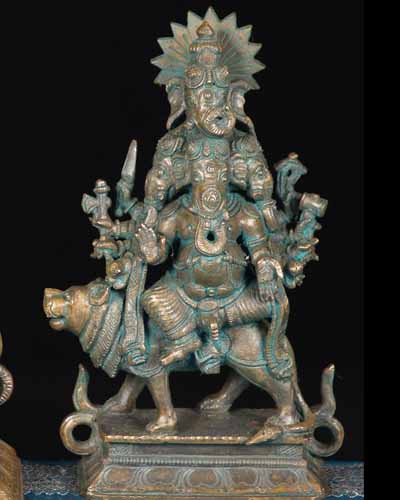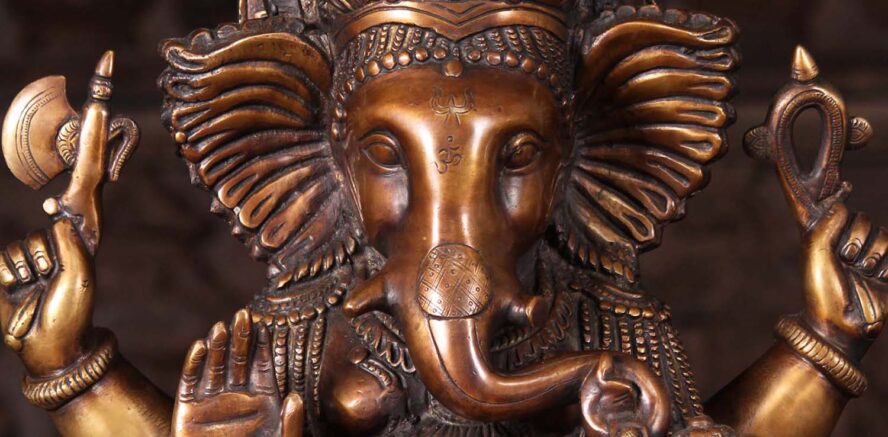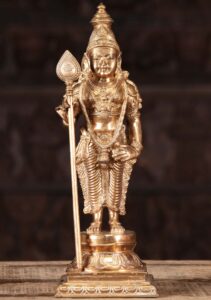
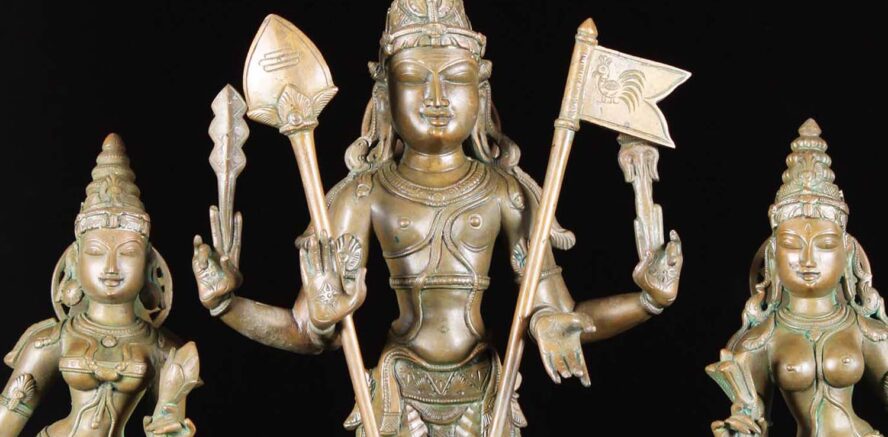
The ardent devotees of Murugan call him by a variety of names – Karthilkeya, Arumuga, Shanmuga, Guhan, Skanda, Subramanya and Kumara. He is the son of the Hindu God of Destruction, Lord Shiva and the brother of the remover of obstacles, Lord Ganesh (The elephant-headed God).
As far as Indian history goes, Skanda began his existence basically from the beginning. He was a popular war god who lived on forested hills, was fond of hunting, fighting, and an appetite for blood sacrifices. He was young, handsome and a fire-eating, spear-wielding bravo.
This basic template went by many names in different parts of the country. In Maharashtra he was called Khandoba and in vast areas of the south of India the god was known as Malai Kilavan, the Lord of the hills in ancient Tamil. His other name was Murugan. This is the name that he is most recognized as today in places of worship.
1. Moola Mantra
“Om Sharavana-bhavaya Namaha“
Meaning: Adoration to Lord Subrahmanya
2. Muruga Sloka
“Gyaanashaktidhara skanda
valliikalyaaNa sundara
devasenaa manaH kaanta
kaartikeya namo.astute
OM subrahmanyaaya namah“
Meaning: Adoration to Lord Kartikeya, who is also known as Skanda. He is the one who holds the staff of intelligence, and holds the beautiful beloved of Goddess Vallii. She is the enchanter of the mind of Goddess Devasena. I offer adorations repeatedly to that Divine Kartikeya.
3. Sri Subramanya Pancharatnam: This mantra is also known as Murugan Pancharatna stotram and is a six-verse prayer chanted everyday by devotees, especially on Sashti Viratham days.
“Shadananam, chandana lepithangam,
Mahorasam, divya mayoora vahanam,
Rudrasya soonum, sura loka nadam,
Brahmanya devam, saranam prapadye
Jajwalyamanam, sura brunda vandyam,
Kumaradhara thada mandirastham,
Kandarpa roopam, Kamaneeya gathram,
Brahmanya devam, saranam prapadye
Dwishadbujam dwadasa divya nethram,
Trayee thanum soolamasim dadhanam,
Seshavatharam, kamaneeya roopam,
Brahmanya devam, saranam prapadye
Surari gorahava shobhamanam,
Surothamam shakthi daram kumaram,
Sudhaara shakthyayudha shobhi hastham,
Brahmanya devam, saranam prapadye
Ishtartha sidhi pradha meesa puthram,
Ishtannadham bhoosura kamadhenum,
Gangodbhavam sarva jananukoolam,
Brahmanya devam, saranam prapadye
Ya slokamidham padatheeha bhakthya,
Brahmanya deva nivesitha manasa san,
Prapnothi bhogamakilam bhuvi yadyadishtam,
Anthe cha gachathi muda guha samyameva“
4. Sri Subramanya Karavalambam : This is one of popular mantra of Lord Subramanya, which is chanted by almost all devotees.
“Hey Swaminatha karunakara deena bandho,
Sree Paravatheesa mukha pankaja padma bandho,
Sreesadhi deva gana poojitha pada padma,
Valleesa nadha mama dehi karavalambham
Devadhi deva sutha, deva ganadhi nadha,
Devendra vandhya mrudu pankaja manju pada,
Devarshi narada muneendra sugeetha keerthe,
Valleesa nadha mama dehi karavalambham
Nithyanna dana nirathakhila roga harin,
Bhagya pradhana paripooritha bhaktha kama,
Sruthyagama pranava vachya nija swaroopa,
Valleesa nadha mama dehi karavalambham
Krouncha surendra parigandana sakthi soola,
Chapa thi sasthra parimanditha divya panai,
Sree kundaleesa drutha thunda sikheendra vaha,
Valleesa nadha mama dehi karavalambham
Devadhi deva radha mandala Madhya methya,
Devendra peeda nagaram druda chapa hastha,
Sooram nihathya sura kotibhiradyamana,
Valleesa nadha mama dehi karavalambham
Heeradhi rathna vara yuktha kireeda hara,
Keyura kundala lasath kavachabhirama,
Hey Veera tharaka jayaa amara brunda vandhya,
Valleesa nadha mama dehi karavalambham
Panchaksharadhi manu manthritha ganga thoyai,
Panchamruthai praudhithendra mukhair muneendryai,
Pattabhishiktha maghavatha nayasa nadha,
Valleesa nadha mama dehi karavalambham
Sree karthikeya karunamrutha poorna drushtya,
Kamadhi roga kalushi krutha drushta chitham,
Sikthwa thu mamava kala nidhi koti kantha,
Valleesa nadha mama dehi karavalambham.“
5. Sri Subrahmanya Ashtottara Sata Namavali: We all know the fact that the names of Lord Skanda are innumerable, but in this sthothram the 108 of His descriptive names are enumerated.
1. Om Skandaya namaha
Hail Skanda! Vanquisher of the mighty foes
2. Om Guhaya namaha
Praise be to the Invisible Lord—He who abides in the hearts of devotees true
3. Om Shanmukhaya namaha
Praise be to the six-faced one
4. Om Balanetrasutaya namaha
Praise be to the Son of the Three-Eyed Siva
5.Om Prabhave namaha
Praise be to the Lord Supreme
6. Om Pingalaya namaha
Praise be to the golden-hued one
7.Om Krittikasunave namaha
Hail to the Son of the starry maids
8. Om Sikhivahanaya namaha
Hail to the rider on the peacock
9. Om Dvinadbhujaya namaha
Hail to the Lord with the twelve hands
10. Om Dvinannetraya namaha
Hail to the Lord with the twelve eyes
11. Om Saktidharaya namaha
Hail to the wielder of the Lance!
12. Om Pisidasaprabhajanaya namaha
Praise be to the destroyer of the Asuras
13. Om Tarakasurasamharine namaha
Praise be to the slāyar of Tārakāsuran
14. Om Raksobalavimardanaya namaha
Praise be to the Victor of the Asuric forces
15. Om Mattaya namaha
Praise be to the Lord of felicity
16. Om Pramattaya namaha
Praise be to the Lord of bliss
17. Om Unmattaya namaha
Hail Oh passionate One
18. Om Surasainyasuraksakaya namaha
Hail Saviour of the Devas
19. Om Devasenapataye namaha
Hail Commander of the Heavenly hosts
20. Om Pragnya namaha
Hail, Lord of Wisdom
21. Om Kripalave namaha
Hail Compassionate One
22. Om Bhaktavatsalāya namaha
Lover of devout ones, Praise be to Thee
23. Om Umasutaya namaha
Son of Uma—Praise be to Thee
24. Om Saktidharaya namaha
Mighty Lord—Praise be to Thee
25. Om Kumaraya namaha
Eternal youth—Praise be to Thee
26. Om Krauncadharanaya namaha
He who reft asunder the Krauñca Mount—Praise be to Thee
27. Om Senanye namaha
Praise be to the Army Chief
28. Om Agnijanmane namaha
To the effulgence of Fire, all Hail
29. Om Visakhaya namaha
To Him who shone on the astral Visakha—All Hail
30. Om Shankaratmajaya namaha
Thou Son of Sankara—All Hail
31. Om Sivasvamine namaha
Thou Preceptor of Siva—All Hail
32. Om Ganaswamine namaha
On Lord of the Ganas—All Hail
33. Om Sarvasvamine namaha
On Lord, God Almighty, All Hail
34. Om Sanatanaya namaha
Oh Lord eternal, Praise be to Thee
35. Om Anantasaktaye namaha
Thou potent Lord, Praise be to Thee
36. Om Aksobhyaya namaha
Unsullied by arrows art Thou—Praise be to Thee
37. Om Parvatīpriyanandanaya namaha
Thou beloved of Parvati, Praise be to Thee
38. Om Gangasutaya namaha
Oh, son of Goddess Ganga—Praise be to Thee
39. Om Sarodbhutaya namaha
Thou who did’st nestle in the Saravana Lake
40. Om Atmabhuve namaha
Thou Unborn Lord
41. Om Pavakatmajaya namaha
Thou who art born of Fire
42. Om Mayadharaya namaha
Energy Art Thou—Praise be to Thee
43. Om Prajrimbhaya namaha
Praise be to thee Auspicious One
44. Om Ujjrimbhaya namaha
Praise be to the Invincible One
45. Om Kamalasanasamstutaya namaha
Praise be to the Lord extolled by Brahma
46. Om Ekavarnaya namaha
The one Word art Thou—All Hail
47. Om Dvivarnaya namaha
In Two Art Thou—All Hail
48. Om Trivarnaya namaha
Thou Art the Three—All Hail
49. Om Sumanoharaya namaha
Thou Stealer of pure hearts—All Hail
50. Om Caturvarnaya namaha
In four Art Thou—All Hail
51. Om Pancavarnaya namaha
In five letters Art Thou—All Hail
52. Om Prajapataye namaha
Father of all Creation—All Hail
53. Om Trumbaya namaha
Praise be to Thee, Oh Peerless One
54. Om Agnigarbhaya namaha
Thou who dost sustain the fire
55. Om Samigarbhaya namaha
Hail Thou who arose out of the Vanni flame
56. Om Visvaretase namaha
Thou glory of the Absolute Paramasivam, All Hail
57. Om Surarighne namaha
Oh, Subduer of the foes of the Devas, All Hail
58. Om Hiranyavarnaya namaha
Thou resplendent One, All Hail
59. Om Subhakrite namaha
Thou Auspicious One—All Hail
60. Om Vasumate namaha
Thou Oh Splendour of the Vasus All Hail
61. Om Vatuvesabhrite namaha
Praise be to Thee, Oh lover of celibacy
62. Om Bhushane namaha
Thou Luminous Sun—All Hail
63. Om Kapastaye namaha
Thou Effulgence divine, All Hail
64. Om Gahanaya namaha
Thou Omniscient One—All Hail
65. Om Chandravarnaya namaha
Thou Radiance of the Moon—Praise be to Thee
66. Om Kaladharaya namaha
Thou who adorns the crescent—Praise be to Thee
67. Om Mayadharaya namaha
Engergy art Thou—Praise be to Thee
68. Om Mahamayine namaha
Great Artist of Deception too art Thou, Praise be to Thee
69. Om Kaivalyaya namaha
Everlasting joy of attainment—Praise be to Thee
70. Om Sahatatmakaya namaha
Art all-pervading—All Hail
71. Om VisvayOnaye namaha
Source of all Existence—All Hail
72. Om Ameyatmane namaha
Oh, Supreme Splendour, All Hail
73. Om Tejonidhaye namaha
Illumination divine—All Hail
74. Om Anamayaya namaha
Savior of all ills—All Hail
75. Om Parameshtine namaha
Thou art Immaculate Lord, Praise be to Thee
76. Om Parabrahmane namaha
Thou Transcendant One, Praise be to Thee
77. Om Vedagarbhaya namaha
The Source of the Vedas art Thou, Praise be to Thee
78. Om Viratsutaya namaha
Immanent Art Thou in the Universe, Praise be to Thee
79. Om Pulindakanyabhartre namaha
Praise be to the Lord of Valli, the Vedda belle
80. Om Mahasarasvatavradaya namaha
Praise be to the source of Gnosis
81.Om asrita Kiladhatre namaha
Praise be to Him who showers grace on those who seek his solace
82. Om Choraghnaya namaha
Praise be to Him who annihilates those who steal
83. Om Roganasanaya namaha
Praise be to the divine Healer
84. Om Anantamurtaye namaha
Praise be Thine whose forms are endless
85. Om anandaya namaha
Praise be Thine, Oh Thou infinite Bliss
86. Om Shikhandīkritagedanaya namaha
Praise be Thine, Thou Lord of peacock banner!
87. Om Dambhaya namaha
Praise be Thine, Oh lover of gay exuberance
88. Om Paramadambhaya namaha
Praise be Thine, Thou lover of supreme exuberance
89. Om Mahadambhaya namaha
Praise be Thine, Oh Lord of lofty magnificence
90. Om Vrishakapaye namaha
Thou who art the culmination of righteousness—All Hail
91. Om Karanopatadehaya namaha
Thou who deigned embodiment for a cause—All Hail
92. Om Karanatita Vigrahaya namaha
Form transcending causal experience
93. Om Anishvaraya namaha
Oh Eternal peerless plentitude, All Hail
94. Om Amritaya namaha
Thou Ambrosia of Life—All Hail
95.Om Pranaya namaha
Thou life of life, Praise unto Thee
96. Om Pranayamaparayanaya namaha
Thou support of all beings—Praise unto Thee
97. Om Vritakandare namaha
Praise unto Thee who subjugates all hostile forces
98. Om Viraghnaya namaha
Thou vanquisher of heroic opponents, Praise unto Thee
99. Om Raktashyamagalaya namaha
Thou art Love, and of crimson beauty— Praise unto Thee
100. Om Mahate namaha
Oh Consummation of glory, All Praise to Thee
101. Om Subrahmanyaya namaha
We praise Thee, Oh effulgent Radiance
102. Om Paravaraya namaha
Oh Supreme Goodness, Praise unto Thee
103. Om Brahmanyaya namaha
We praise Thee, luminous wisdom serene
104. Om Brahmanapriyaya namaha
Thou who art beloved of seers—Praise unto Thee
105. Om Loka Gurave Namaha
Oh universal Teacher, All Praise to Thee
106. Om Guhapriyaya Namaha
We praise Thee, In-dweller in the core of our hearts
107.Om Aksayaphalapradaya namaha
We praise Thee, Oh bestower of indestructible results ineffable
108.Om Sri Subrahmanyaya namaha
We praise Thee, most glorious effulgent Radiance
6. Sri Subramanya Bhujaga Stotram : This mantra is believed to remove Kuja dosha, delayed marriages, clashes, legal disputes, disturbed married life etc.
“Bhajeham kumaram bhavnikumaram galollasiharamNamtsya edwiharam, repustomaparam nrusimhavatramSada nirvikaram guham nirvicharam
Namameesa putraam japashonagatram kuraraatisatrumRuvemdwagni neetram, mahabahrnipatram sivasabjamitramPrabhaswatkaltrayam puranam pavitram
Aneekarkakoti prabhavasyalamtam manoharimanikyaBhooshojwalam tam, sritanamabheestam nisamtamKrupavarikallola bhastkataksham varjanmanoharisoNambujaksham, prayogapradana pravhaikadaksham baje Kanti kantam parastomarakham
Sukumdaprasoonavalisobhitamgam saratpoorna chandraprabha Kantikantam, sirisha prasunabhiramam bhavatam bhaje deva Senapatim vallabham tam
Sukastoorisimdooraswalllalatamdayapoorna chittammaha Deviputram, raveedoolllasadratna rajatkireetam bhajekreedita Kasagangadikootam“
View All Our Mantras to Hindu Gods
including English and Sanskrit translations
| 10 Kali Mantras | 15 Saraswati Mantras | 4 Ganesha Mantras |
| 6 Murugan Mantras | 8 Krishna Mantras | 7 Hanuman Mantras |
| 3 Lakshmi Mantras | 8 Vishnu Mantras | 5 Shiva Mantras |